Monday, 28 April 2014

Homemade Healthy Muesli

Since making this muesli, I have been totally addicted to it!  Not only at breakfast, but lunch and snack cravings are being turned into Muesli time!


It is so easy to make and so delicious.  I was lucky to have most of these ingredients in my store cupboard.  I would recommend using what you have – the options are endless.


If you are weight watching, be aware of the amount of fruit you are adding as the natural sugar in dried fruit is very high.  The coconut however can be used in abundance!


I made my own dried apple chips to add to the muesli, and will in the future dry more fruit.  I can’t understand why sugar is added to already sweet fruit.


I use cup measurements for this, but any cup will do.  It was only to get an idea of proportions, but not actually important.


Ingredients


1 Cup Rolled Oats

½ Cup Oat Bran

½ Cup Almonds (pulsed in a processor, or roughly chopped)

½ Cup Coconut chips

1/3 Cup Raw Chia Seeds

1/3 Cup Mix Seeds

1 whole dried Apple

1/3 Cup Banana Chips

¼ Cup Golden Incan Berries

¼ Cup dried Raspberries

2 tsp ground cinnamon

2 tsp Raw Cacao


Alternatives


Raisins, Sultanas, Currents, dried strawberries, any dried fruit really – whatever you like or whatever is in the cupboard.

If you are avoiding sugar, cut out all dried fruit except for the coconut.

Give everything a good mix in a large bowl, and store in an airtight container. 


This is enough for over 10 servings.
My favourite is Muesli with Yogurt and Honey!! 


Homemade muesli with yogurt and honey
 
Or you can add fresh fruit for more yumminess!!

Friday, 25 April 2014

Homemade Dried Apple


I have been very productive today.  Firstly I have dinner prepped and cooking away in the slow cooker (Homemade Pork Curry, blog coming).  I wanted to make my own muesli, and as healthy as possible. 
 
Muesli is not always for those on a diet, and what you buy is not always as healthy as you may think.  Firstly if you are on a diet be careful what you eat with muesli, the sugars added can be through the roof.  I decided that I wanted apple in my muesli so when I saw that there was added sugar in the readymade dried apple packets I decided to make my own.

Drying your own fruit still contains a lot of natural sugars. 

It is super easy, just a little time consuming.  Next I shall be drying my bananas too.

All you need is one apple, a baking tray, parchment paper and an oven! 

When I make this again, I shall do at least 2 apples - so the kids can have a health lunchbox addition (they have not seen a scrap from this batch, it was too good to share)!


Method:

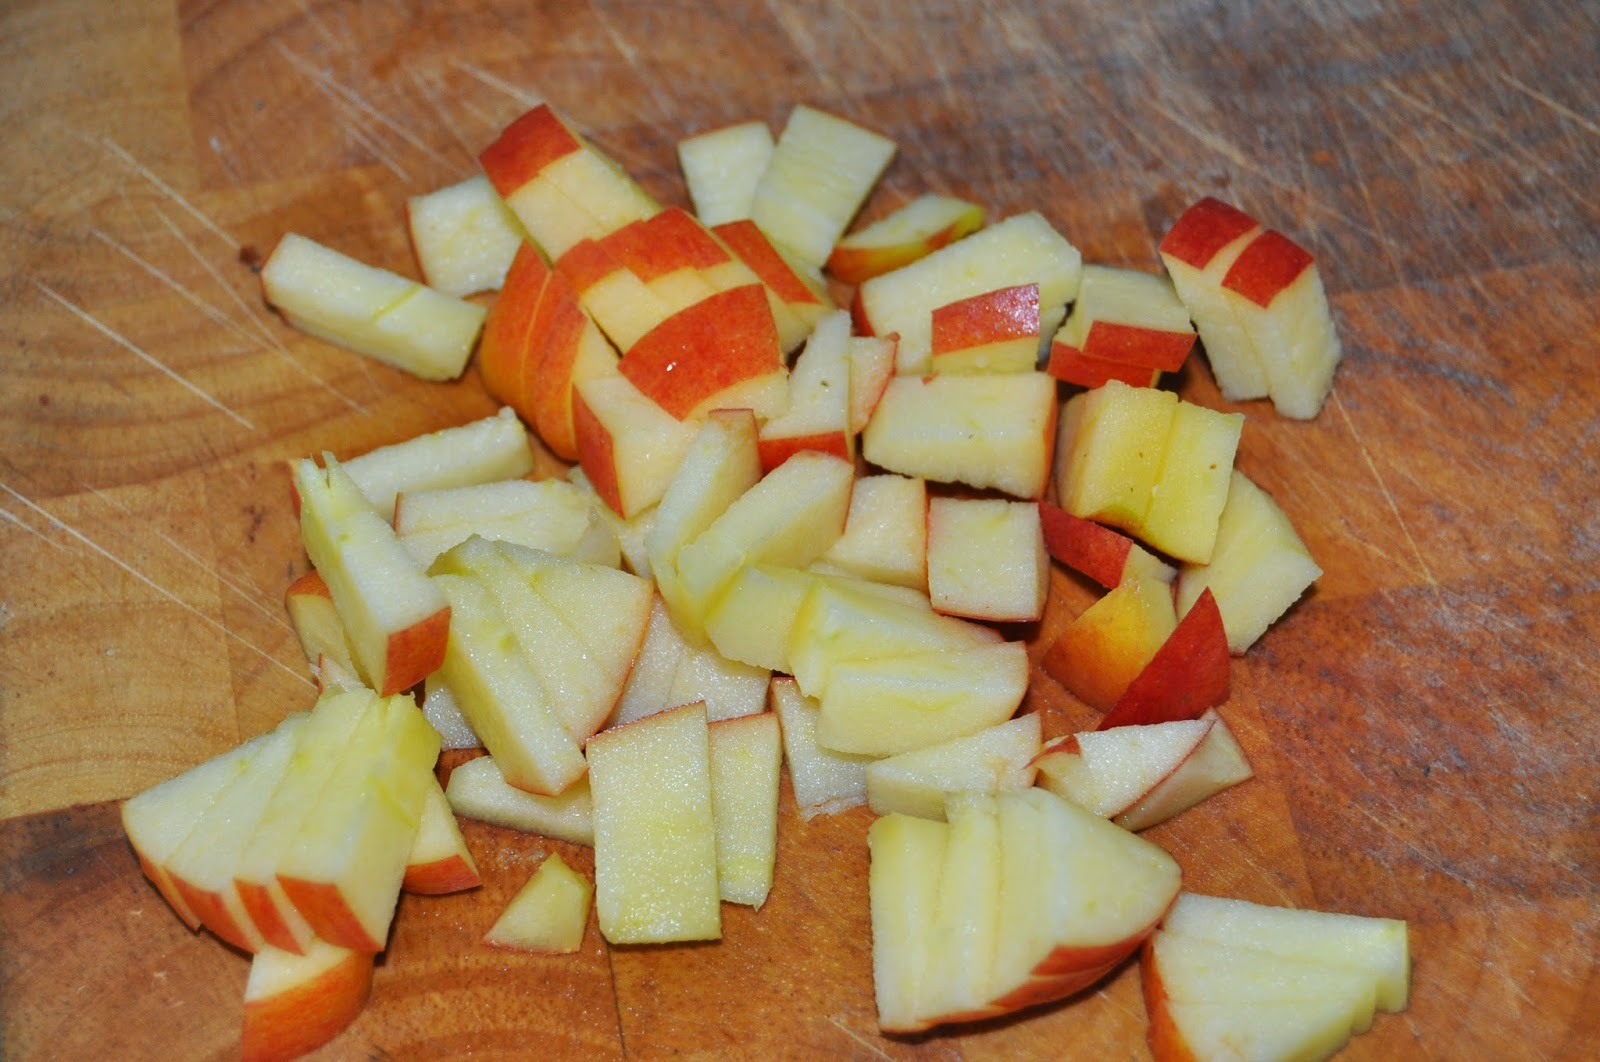
Simply slice or dice the apple discarding the core (also skin is optional, I kept mine on for the added goodness.  I was worried it may be tough, but it was perfect).  To be honest, I preferred the diced pieces to add to my muesli, but I would slice for the kids’ lunch boxes as an alternative snack!

Prepare a baking tray with parchment paper, and sprinkle the apple pieces.

Pre-heat an oven to 100°C (Fan assisted) and bake the apple pieces for an hour, turn/stir all the pieces and bake for another hour (slightly chewy) or 2 hours (for crisper).  Switch the oven off and leave the door ajar till cool.

 Tadahh, these are yummy (hence the amount of apple diminishes with each photo – I could not resist!) ready to eat or add to muesli or desserts.

Coming next....Homemade Muesli!

Tuesday, 22 April 2014

Real Bread, Fresh Flour

I have been making bread by hand for years, however today I tried a new fresh flour.  I have been using fresh flour for a while as I wanted nice healthy homemade bread.  I shall use the words of the producers as to why I have searched to find a good local mill -


“You can increase the amount of vitamins, antioxidants, minerals, and natural fiber in your diet the natural way. Whole wheat flour begins to lose nutrients during the milling process. Modern commercial mills destroy many nutrients because of the high heat generated in the milling process….

…Most refined wheat products have chemicals and other unpronounceable additives that are unnatural and may damage your health.”

While I love a slice of fresh white bread, the chemicals added to prolong the shelf life leave me hunting for a healthier solution. I found http://www.imbhamsfarmgranary.com/  Who luckily have a stall at a local farmers market once a month.  I have been using their ‘Sussex Bread Flour’ and it is a nice loaf, however I have just made a loaf using the ‘Seeded Bread Flour’ and it is delicious!  So delicious, I decided to write this blog!

While the shelf life is not as long as shop bought flour, if I know I will have left over I keep it in the freezer and it lives a little longer (but this is rarely the case for us)!

Using a basic loaf recipe:

550g Seeded Bread Flour
7g quick Yeast
3g Ground Sea Salt
2tsp honey
40ml Extra Virgin Olive Oil
300-350ml warm Water

I use a dough hook in my stand mixer for making bread dough. 
 

Mix all the ingredients together – adding the water a little at a time until all the flour is combined and starts to make a ball.  Mix for 7 minutes in the mixer or 10 minutes by hand.

Leave covered with a clean tea towel to rise for an hour.  Shape into rolls, loaf or plait.  Leave to prove for another hour.
Pre heat oven to 200°C (Fan assisted).
Bake for 30 minutes.

This is a delicious sweet and nutty loaf.  If I was baking it just for myself I would sprinkle some more seeds on top before baking – my kids however are not so keen and pick them off the top.  I have stopped wasting them and leave it bare!


As it was the first day back to school this morning after the Easter holidays, we were running rather late.  I forgot to take a picture of the full loaf (it was in fact sliced while still warm slathered in butter and shoved in the lunch boxes).

Wednesday, 27 November 2013

November brings Cake International to the NEC, and I could not resist another year of missing out.  I have been to London a couple of times, but this was my first visit to the larger, bigger and brighter NEC one.

I actually think it was better than the London event.  There is more space and therefore less elbows to the ribs!  I think there were a few more exhibitors, and hundreds more competitors - which was so great to see.   There are so many talented and skilled cake decorators it is so humbling to see!

I decided to enter a competition again, and with all the travel I decided on entering the cupcake class.  Driving a wedding cake over 200 miles was too much for my nerves to face.

This year the rules had changed for this class, and after a couple of harassing emails to the organisers I was clear that we were to make a dozen cakes comprising of two different flavours and 2 different styles (i.e. 6 identical to each other).

I planned hundreds of different designs, and until I started to make them was I set on two (with perhaps a little altering on the way).

Below are the cakes I made.
I thought I would keep it simple with flavours.  While I do have a cuptail (a cocktail in a cupcake) range I thought the judges would prefer more traditional flavours - chocolate mud and vanilla.

Dragon and wave cupcakes

My wave cupcake was hand painted.  Orange blossoms cut using cutters, and the large blossom - I cut each individual petal, painted and dusted then assembled on the topper

My dragon cupcake the topper was hand painted gold, then the dragon was hand modelled.  These took about an hour each to model.  I used scissors for the scales along the back.


Judges tasting!
 
The crazy thing about this competition was that when my friend went to collect my cakes at the end of the show, 4 of them and the board had been stolen!  I would understand someone taking them all or someone getting curious/hungry and pinching a couple of cakes, but to take 4 and the board...I really don't understand!
 
I did have a blast when I was there on Friday and met up with some of my lovely cakey friends!  I shall continue to enter competitions!


Saturday, 19 October 2013

Back to blogging ... Ben 10 and Octonauts party

I have been a very bad blogger…in fact I have not been a blogger at all for months!  My last post was just before the children started their summer holiday.  So that explains 2 months silence.  Since they have returned the days and weeks have been flying past.

I have made 3 major cakes.  One for each of the kiddies!

The latest was for James, 5 my boys’ boy.  He is the easiest boy to buy presents for – he loves everything boyish…sharks, planes, Lego, Octonauts and under the sea, Ben 10 , Dinosaurs….. I could go one.  He gives me a brief every year and this year he wanted a combined cake of Octonauts and Ben 10 (although this did change in the days leading up to the party – but it was too late!).  I thought this was even trickier to do than last years dinosaurs and sharkie cake!

I decided on an Octonauts Rescue Mission of Ben 10 and his character Rath.


We had a large party with all the boys from his reception class.  I decided to make Ben 10 and Octonaut Cake pops and shark cupcakes for their party bags.   

Ben 10 Cake pops


Octonauts Cake pops
With fondant hats.

Shark cupcakes
These shark cupcakes were so quick and easy but looked so effective with some blue and white 'sea' buttercream piped on top...as I am out of blogger practice I did not take picture on how to make the fins, but I'll try to do some more soon.


Tuesday, 25 June 2013

Family Holiday in Latchi, Cyprus

So I have been rather quiet, and here is one of the reasons why:
We have spent our family holidays in my parent’s villa in Cyprus.  It is in a fishing village called Latchi which is near Polis which is near Paphos.

3 double bedrooms so we were all comfortable even with Mum and Dad!

We hired a car at Paphos airport, drove the hour trip to the villa and had a truly lovely holiday. 
Everyday was spent with mornings at the Latchi beaches
and afternoons by the pool.  James our 4 year old learnt to swim and Sophia, 7 learnt back stroke. 


  Both were able to snorkel by the end of the 10 days too

 (baby thought she could - but was just a sea monster instead!).

 Most days lunch was on the side patio, allowing the food to go down by laying on the sun loungers.


We cooked in a few nights having bought food at the Papantonio Supermarket in Polis (5 minuets drive) and lit the BBQ for a couple.  Others we ate out at some of the great local restaurants in Latchi and Polis.
There is some great food to be had, our favourite being Moussaka, Loukaniko and Sheftalia sausages.  We loved ordering the Meze where a mix of dips, pitta, and meats came ...ooh and not forgetting the grilled Haloumi Cheese!  Hindsight - should have taken some photos of the delicious food.  I have even made Tzatziki (Greek yogurt with cucumber and garlic dip) several times since getting home!

The villa now has wifi set up, (doesn’t mean I logged onto my emails though!!) and British TV through it.  We barely watched television, but the kids borrowed a DVD from the shop in Polis and had a film night one evening while we were on the mojitos!

We celebrated Daddy's birthday there!


So if you are looking for a lovely restful break then conveniently it is for hire, and you can pick up cheap flights to Paphos.

There are more pictures of inside the villa on it’s Facebook page so take a peek!  3 Bed Villa Neo Chorio, Cyprus to rent
A really great villa to rent near Paphos, Cyprus!

Tuesday, 4 June 2013

How to stack a cake with a central dowel

I recently had to transport a wedding cake already stacked (safest way to take a tiered cake is unstacked and stack at venue).  I searched the internet for the best ways to do this, and all I could find was using a central dowel which has been hammered into the top of the cake.  The thought of doing this scared me too much, I just can not take a hammer anywhere near a cake that had taken so many hours to create!

So I decided to deconstruct it and dowel in reverse.

 Firstly cut out circles the size of your bottom tier out of cardboard.  Using a compass to get perfect cirles, also the hole created is the centre - useful for cutting out the hole.

I cut out 5 cardboard circles and stuck together with hot glue.


Using a sharp implement (my craft knife was perfect) and cut a circle from the cardboard the size of the dowel.  I cut out 4 of the cardboard layers.


Cover with tin foil to make food safe.


Find the centre of your cake cards for each other tier and cut a hole a tiny bit larger than the size of your dowel (I used a large white polydowel, but the wooden ones would work just as well (pour boiling water over first))


Centre the bottom tier and dowel - secure under and above with some chocolate (or Royal Icing if not doing a chocolate cake.).  You can do this and the following with iced cakes - provided they have been left the covered cakes for the covering to harden.

I roughly ganached my cakes at this stage and made a whole through the cakes with another dowel. 
Now is the time to measure and cut your central dowel as you do not want it sticking out of the top of the cake.

Dowelled tiers too.  Don't forget each tier will still need dowels in.


Between each tier, layer with melted chocolate or royal icing to stick each tier together
I stacked while still needing a couple of layers of ganache - due to the style of my cake, this did aid to its security.


Ganached again while stached.  But now the cake is lovely and secure, perfect for boxing and transporting. 

I wrapped this cake in modelling chocolate, transported then added the final details at the venue.

I placed the cake in cardboard box, placed a non-slip mat in the boot of the car and box on top.  Even with the cake nice and secure I still drove very carefully for 60 miles.

Ok so I drove for the 60 miles - however I did not place the cake in or out of the box it was SOOOOOOOO heavy!  So be warned you will probably need help to carry a cake this big!

It arrived in a perfect condition, and I could finally breath!!


Taa dahhhhh  Here it is fully decorated at the venue!  I was very pleased with how the cake arrived and turned out!